As always, please don’t be dumb. Operate within the laws of your country. I am not responsible for anything you may or may not do with this article and the information herein. This is provided as an educational resource and should not be used to circumvent any security facilities.
Using Proxycannon-ng to Create A Private Proxy Network
The modern age of computers is amazing to me. In a few mere minutes we can spin up a seemingly unlimited number of virtual servers on any one of the hundreds of cloud providers out there around the world.
With all of this added ability of compute power we also increase our ability to distribute our HTTP requests over a larger and larger pool of networks. I came across this awesome project on GitHub called proxycannon-ng.
It started as a hackathon project and has since seemingly halted development, however we can still use their code to spin up a network of computers to proxy our requests through!
They provide a nice diagram to explain what we’re making here. For our examples we’ll only be using AWS but the concept is the same across the board.
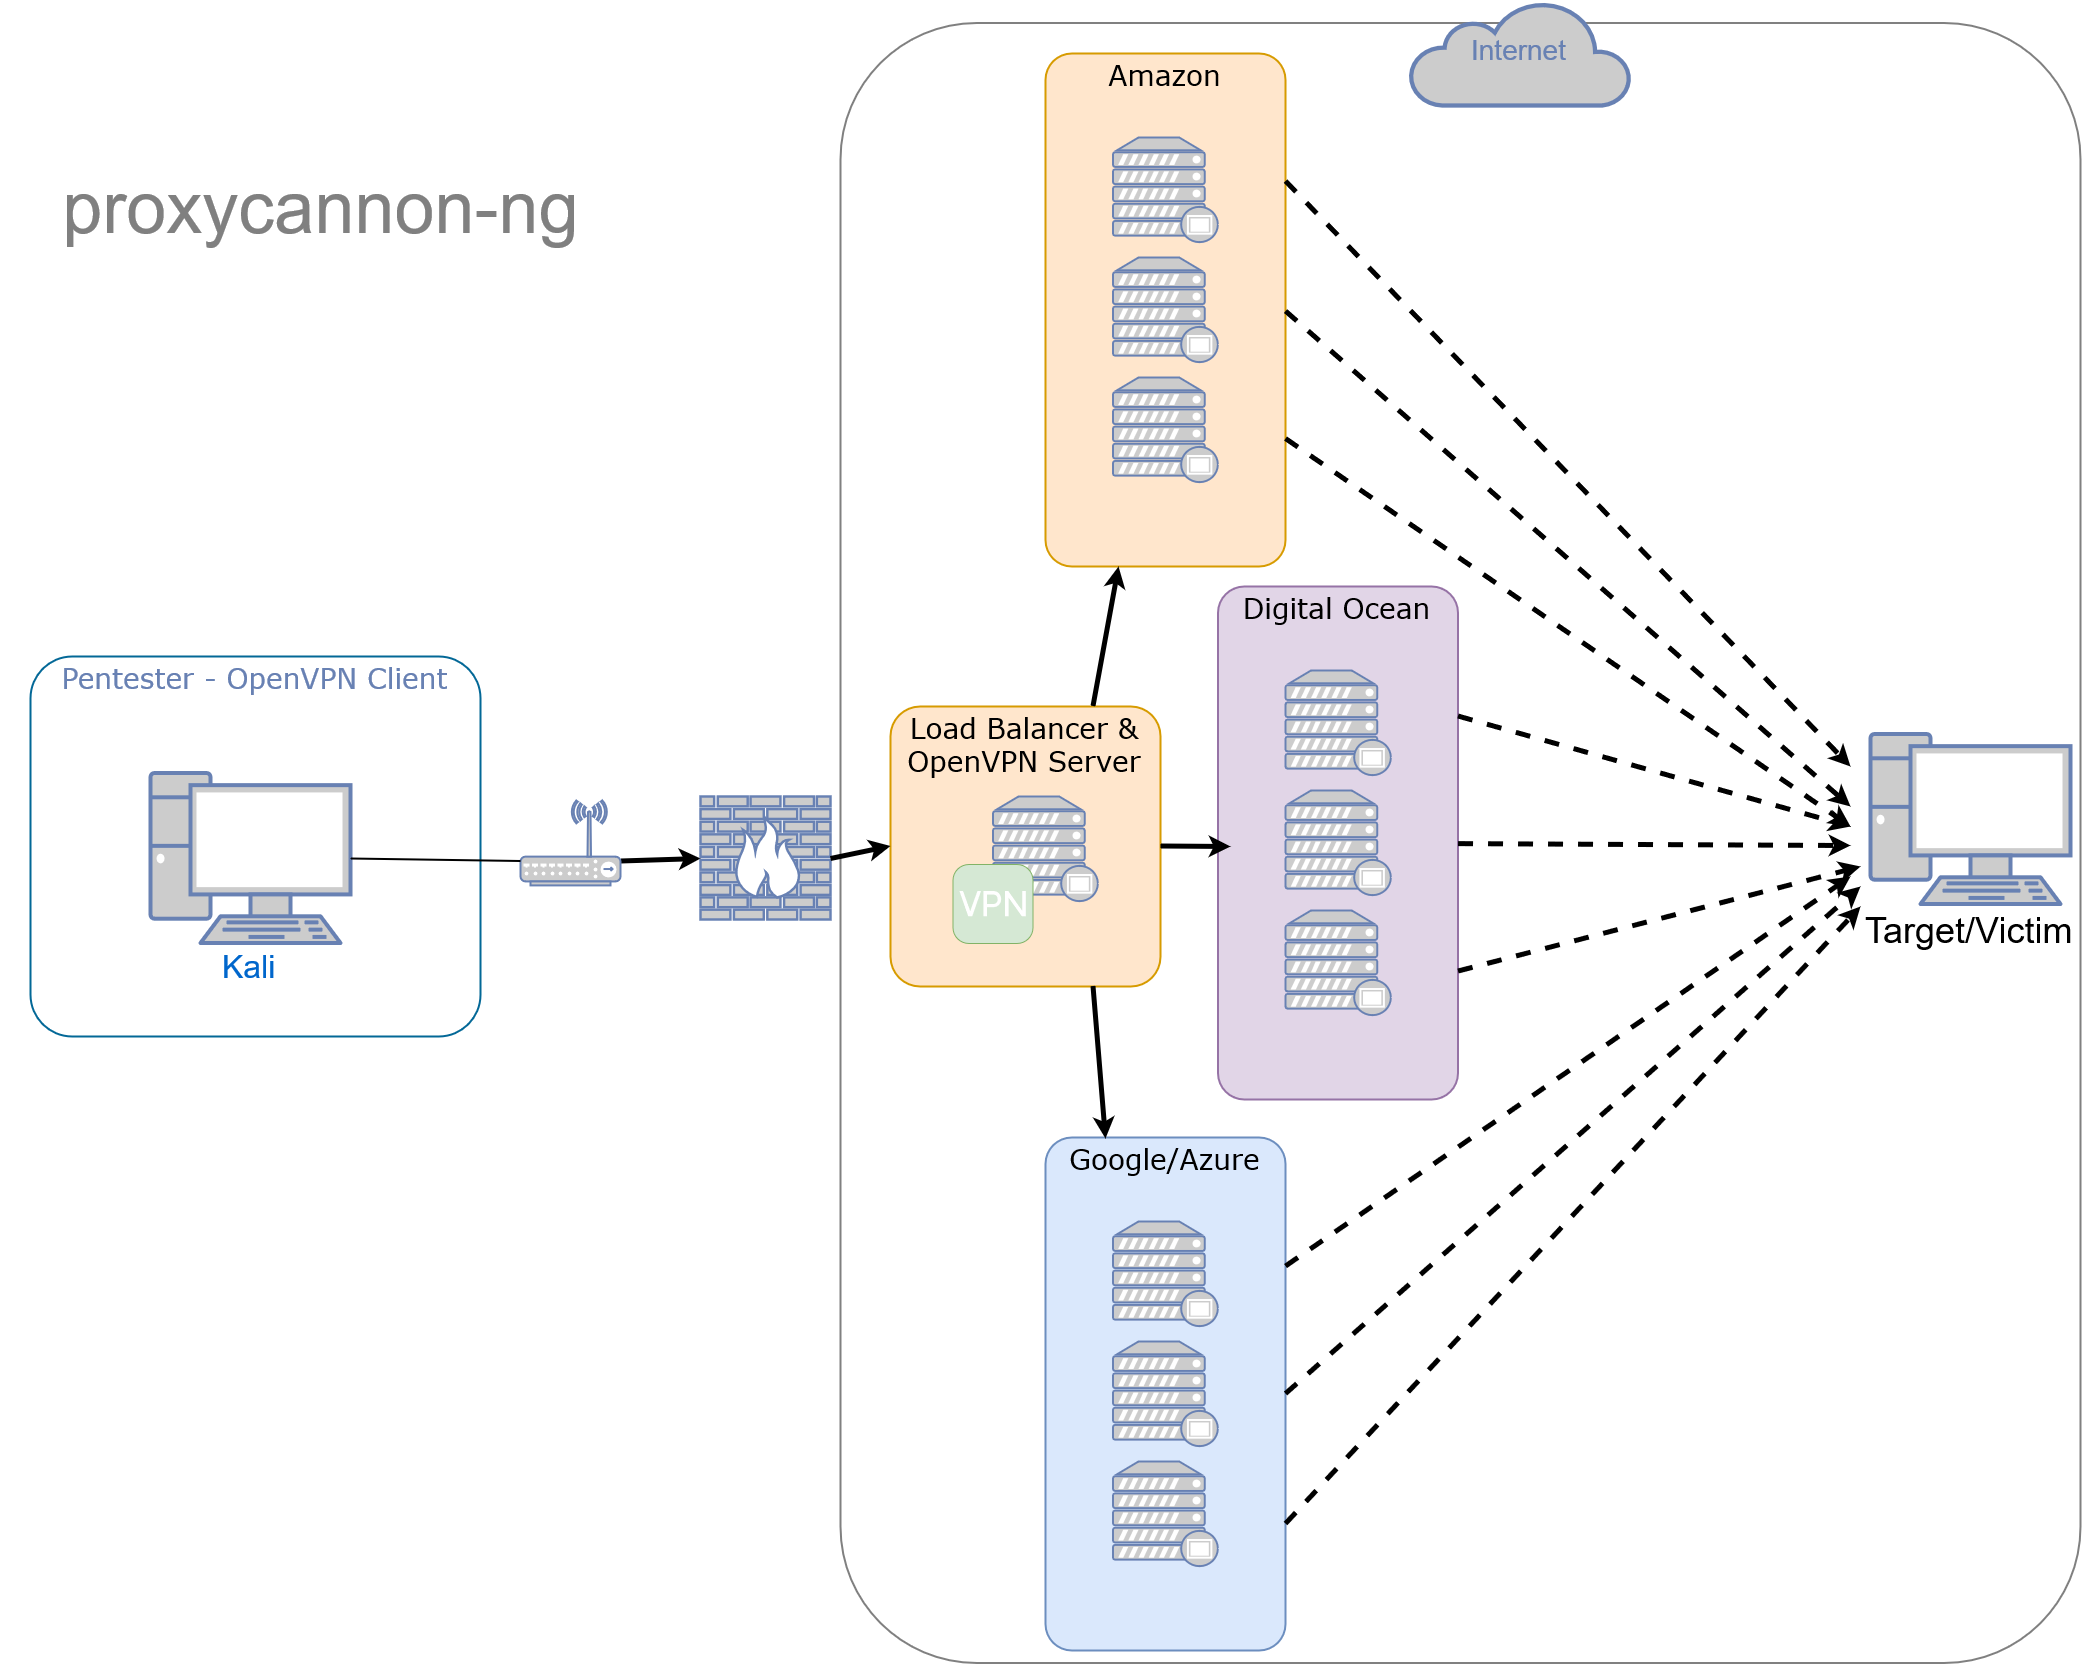
Results of What We’re Making:
Creating the Control-Server
The control-server is a OpenVPN server that your workstation will connect to. This server always remains up. Exit-nodes are systems connected to the control-server that provides load balancing and multiple source IP addresses. Exit-nodes can scale up and down to suite your needs.
AWS (setup the control-server)
#1 - Create a separate SSH key pair
- In the AWS console, go to services (upper left)
- Select EC2 under the Compute section.
- Select Key Pairs in the nav on the left.
- Select Create Key Pair and name it ‘
proxycannon’. - Download and save the key to
~/.ssh/proxycannon.pem
#2 - Launch the control-server instance
- Launch (1) Ubuntu Server t1-micro instance and use the
proxycannonkeypair.- Recommend public AMI
ami-0f65671a86f061fcd- Only available in us-east-2) - anyUbuntu Server 18.04ami should work.
- Recommend public AMI
- Login to the control-server via ssh
- Download and install
proxycannon-ng
$ git clone https://github.com/proxycannon/proxycannon-ng
$ cd proxycannon-ng/setup
$ chmod +x ./install.sh
$ sudo ./install.sh
#3 - Create a new IAM user, set the needed permissions, and copy over your keys. It’s quick:
- In the AWS console, go to services (upper left)
- Select IAM under the Security, Identity & Compliance section
- In IAM, select Users in the nav on the left.
- Select Add user
- Fill out a User name, and for access type, select programmatic access. Click Next.
- Select the tab/box that’s labeled Attach existing policies directly. Add the following policy: AmazonEC2FullAccess. Click Next, than Create user
- Copy the access key and secret for the control-server and paste it in
~/.aws/credentials
[default]
aws_access_key_id = REPLACE_WITH_YOUR_OWN
aws_secret_access_key = REPLACE_WITH_YOUR_OWN
region = us-east-2
#4 - Setup terraform
Perform the following on the control-server:
- Copy your proxycannon.pem SSH key into
~/.ssh/proxycannon.pem cdintoproxycannon-ng/nodes/awsand edit thevariables.tffile updating it with the subnet_id. This is the same subnet_id that your control server is using. You can get this value from the AWS console when viewing the details of the control-server instance. Defining this subnet_id makes sure all launched exit-nodes are in the same subnet as your control server.- Run
terraform initto download the AWS modules. (you only need to do this once)
#5 - Copy OpenVPN files to your workstation
Copy the following files from the control-server to the /etc/openvpn directory on your workstation:
- ~/proxycannon-client.conf
- /etc/openvpn/easy-rsa/keys/ta.key
- /etc/openvpn/easy-rsa/keys/ca.crt
- /etc/openvpn/easy-rsa/keys/client01.crt
- /etc/openvpn/easy-rsa/keys/client01.key
You can also run this script below to compress everything you need to ~/copy_me.tar.gz and then you can download that and extract to /etc/openvpn on your workstation.
# Copy necessary files and compress to ~/copy_me.tar.gz
$ mkdir ~/copy_me
$ sudo cp ~/proxycannon-client.conf ~/copy_me
$ sudo cp /etc/openvpn/easy-rsa/keys/ta.key ~/copy_me
$ sudo cp /etc/openvpn/easy-rsa/keys/ca.crt ~/copy_me
$ sudo cp /etc/openvpn/easy-rsa/keys/client01.crt ~/copy_me
$ sudo cp /etc/openvpn/easy-rsa/keys/client01.key ~/copy_me
$ tar czfv ~/copy_me.tar.gz ~/copy_me
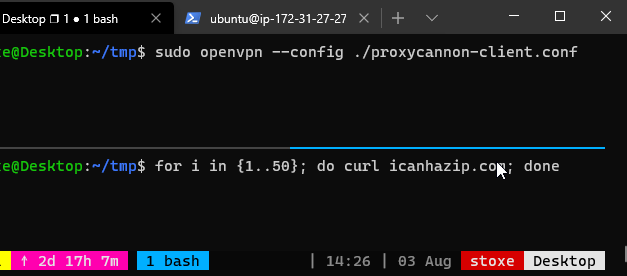
After you copied and extracted the files to /etc/openvpn on your workstation test OpenVPN connectivity from your workstation by running:
$ openvpn --config proxycannon-client.conf
Setup Completed!
From now on you’ll only need to connect to the VPN to use proxycannon-ng.
The next section details how to add and remove exit-nodes (source IPs):
Managing exit-nodes
Scaling of exit-nodes is controlled on the control-server using terraform.
Scale up exit-nodes
To create AWS exit-nodes, do the following:
cdintoproxycannon-ng/nodes/aws- Edit the count value in
variables.tfto the number of exit-nodes (source IPs) you’d like - run
terraform applyto launch the instances.
Scale down exit-nodes
If you want to stop all exit-nodes run terraform destroy.
OR
Scaling down exit-nodes can be done by reducing the count value in variables.tf and running terraform apply again. Terraform will automatically remove X number of exit-node instances.